By yummyrecipes
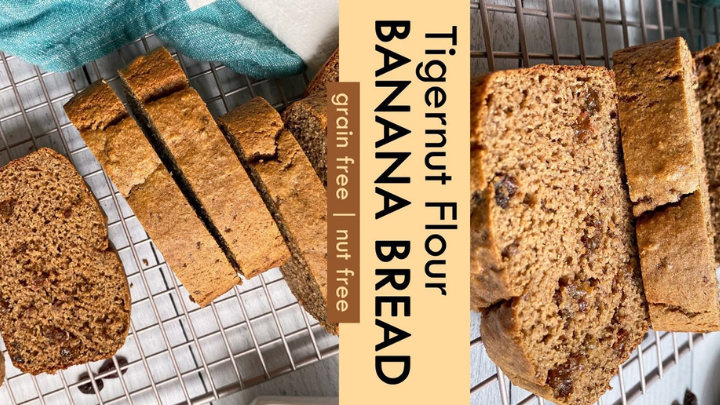
Banana bread is a timeless comfort food, but this Tiger Nut Flour Banana Bread takes it to a new level with its gluten-free, nutrient-dense twist. Made with tiger nut flour—a naturally sweet, fiber-rich alternative to traditional flour—this recipe delivers a moist, flavorful loaf that’s perfect for breakfast, snacks, or dessert. Whether you’re gluten-intolerant, seeking healthier baking options, or simply curious about tiger nut flour, this American-inspired recipe with a healthy focus is easy to make and sure to impress. In this article, we’ll guide you through the process of making this delicious banana bread, including tips, variations, and serving ideas.
Cuisine: American-inspired, Gluten-Free, Healthy Baking
Keywords: tiger nut flour, banana bread, gluten-free, healthy baking, nut-free, dairy-free option, naturally sweet, breakfast, snack, dessert
What Is Tiger Nut Flour Banana Bread?
Tiger Nut Flour Banana Bread is a wholesome take on the classic banana bread, using tiger nut flour as the primary flour. Despite its name, tiger nut is not a nut but a small tuber, making it a great option for those with nut allergies. Tiger nut flour is naturally gluten-free, high in fiber, and slightly sweet, which complements the ripe bananas in this recipe. The result is a dense, moist loaf with a subtle nutty flavor, enhanced by warm spices like cinnamon and optional add-ins like chocolate chips or walnuts. This bread is perfect for those seeking a healthier alternative without sacrificing taste.
This recipe yields one 9×5-inch loaf, serving 8–10 slices, with a preparation time of about 15 minutes and a baking time of 50–60 minutes. Let’s dive into the ingredients and steps!
Ingredients
To make Tiger Nut Flour Banana Bread, you’ll need the following ingredients. The recipe is flexible, allowing substitutions for dietary preferences like dairy-free or vegan diets.
For the Banana Bread:
- 1 ½ cups (180g) tiger nut flour (sifted to remove any clumps)
- 1 tsp baking soda
- ½ tsp baking powder (gluten-free)
- ½ tsp ground cinnamon
- ¼ tsp ground nutmeg (optional, for warmth)
- ¼ tsp salt
- 3 large ripe bananas (about 1 ½ cups mashed, very ripe with brown spots)
- ⅓ cup (80ml) maple syrup or honey (for natural sweetness)
- 2 large eggs (or flax eggs for vegan: 2 tbsp ground flaxseed + 6 tbsp water)
- ⅓ cup (80ml) melted coconut oil or unsalted butter (or vegan butter for dairy-free)
- 1 tsp vanilla extract
- ½ cup (90g) dark chocolate chips, chopped nuts (e.g., walnuts or pecans), or dried fruit (optional, for texture)
For Optional Topping:
- 1 tbsp sliced almonds or tiger nut flour (for dusting)
- 1 tsp turbinado sugar (for a crunchy top)
- 1 banana, sliced lengthwise (for decoration)
Equipment:
- 9×5-inch loaf pan
- Parchment paper or non-stick spray
- Mixing bowls
- Fork or potato masher (for mashing bananas)
- Whisk or spatula
- Measuring cups and spoons
- Sifter (optional, for tiger nut flour)
- Cooling rack
- Oven
Step-by-Step Instructions
Follow these steps to create your Tiger Nut Flour Banana Bread. Each step is designed to be straightforward, with tips to ensure a perfect loaf.
Step 1: Preheat the Oven and Prep the Pan
- Preheat your oven to 350°F (175°C).
- Grease a 9×5-inch loaf pan with non-stick spray or line it with parchment paper, leaving an overhang for easy removal.
Tip: Parchment paper makes it easier to lift the bread out of the pan and ensures even baking.
Step 2: Mash the Bananas
- In a large mixing bowl, peel and mash the ripe bananas with a fork or potato masher until smooth with a few small lumps. You should have about 1 ½ cups of mashed banana.
- Add the maple syrup, melted coconut oil, eggs (or flax eggs), and vanilla extract to the mashed bananas. Whisk until well combined.
Tip: Very ripe bananas with brown spots are ideal for maximum sweetness and moisture. Avoid underripe bananas, as they’ll make the bread less flavorful.
Step 3: Mix the Dry Ingredients
- In a separate medium bowl, sift the tiger nut flour to remove any clumps. This ensures a smoother texture in the final bread.
- Add the baking soda, baking powder, cinnamon, nutmeg (if using), and salt to the tiger nut flour. Whisk to combine evenly.
Tip: Tiger nut flour can be dense, so sifting is important to avoid a gritty texture. If you don’t have a sifter, whisk thoroughly to break up clumps.
Step 4: Combine Wet and Dry Ingredients
- Gradually add the dry ingredients to the wet ingredients in two batches, stirring gently with a spatula or wooden spoon until just combined. Avoid overmixing, as this can make the bread tough.
- If using optional add-ins like chocolate chips or nuts, fold them in now, reserving a small handful for topping if desired.
- The batter will be thick but pourable. If it seems too dry, add 1–2 tbsp of milk or water; if too wet, sprinkle in 1 tbsp more tiger nut flour.
Tip: Tiger nut flour absorbs more liquid than traditional flour, so the batter may look denser than you’re used to. This is normal.
Step 5: Fill the Pan and Add Toppings
- Pour the batter into the prepared loaf pan and smooth the top with a spatula.
- For a decorative touch, place a halved banana cut-side up on top of the batter, or sprinkle with sliced almonds, a dusting of tiger nut flour, or turbinado sugar for a crunchy crust.
- Gently press any toppings into the batter to ensure they adhere during baking.
Tip: Avoid overloading the top with heavy add-ins, as they can sink into the dense batter.
Step 6: Bake the Bread
- Place the loaf pan in the preheated oven and bake for 50–60 minutes, or until a toothpick inserted into the center comes out clean or with a few moist crumbs.
- If the top browns too quickly, loosely cover the loaf with aluminum foil after 40 minutes to prevent burning.
- Remove from the oven and let the bread cool in the pan for 10 minutes before transferring to a cooling rack to cool completely.
Tip: Tiger nut flour breads can be delicate when warm, so allow ample cooling time before slicing to prevent crumbling.
Step 7: Slice and Serve
- Once fully cooled, slice the banana bread into 8–10 slices using a serrated knife for clean cuts.
- Serve as is, or spread with a bit of butter, almond butter, or cream cheese for extra indulgence.
- Store leftovers in an airtight container at room temperature for up to 3 days, in the refrigerator for up to a week, or freeze slices for up to 2 months.
Tip: Wrap individual slices in plastic wrap before freezing for easy grab-and-go snacks.
Tips for Success
- Source Quality Tiger Nut Flour: Look for finely ground tiger nut flour from reputable brands like Anthony’s Goods or Organic Gemini. Coarse flour can result in a gritty texture.
- Measure Accurately: Tiger nut flour is denser than wheat flour, so use a kitchen scale for precision if possible.
- Don’t Skip the Cooling: Letting the bread cool completely ensures it holds its shape and slices cleanly.
- Adjust Sweetness: If you prefer a sweeter bread, increase the maple syrup to ½ cup or add ¼ cup coconut sugar.
- Storage: To keep the bread moist, store in an airtight container with a piece of parchment paper to absorb excess moisture.
Variations to Try
This recipe is highly adaptable. Here are some variations to suit different tastes or dietary needs:
- Chocolate Chip Banana Bread: Add ¾ cup dark chocolate chips or cacao nibs for a decadent twist.
- Nutty Banana Bread: Fold in ½ cup chopped walnuts, pecans, or sunflower seeds for crunch (ensure nut-free if needed).
- Vegan Banana Bread: Use flax eggs (2 tbsp ground flaxseed + 6 tbsp water) and coconut oil or vegan butter.
- Spiced Banana Bread: Add ½ tsp ground ginger or cardamom for a warmer flavor profile.
- Tropical Banana Bread: Mix in ½ cup shredded coconut or chopped dried mango for a tropical flair.
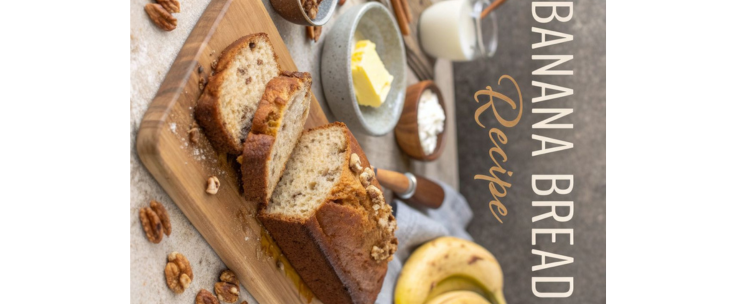
Serving Suggestions
Tiger Nut Flour Banana Bread is versatile and pairs well with various meals and occasions:
- Breakfast: Serve with a smear of almond butter and a cup of coffee or chai for a hearty start to the day.
- Snack: Pair with fresh fruit or yogurt for a balanced, gluten-free snack.
- Dessert: Warm a slice and top with a scoop of vanilla ice cream or coconut whipped cream for a treat.
- Gifting: Wrap the loaf in parchment paper and tie with twine for a thoughtful homemade gift.
- Party Platter: Slice into bite-sized pieces and serve alongside other gluten-free treats for a dessert spread.
Why You’ll Love This Recipe
This Tiger Nut Flour Banana Bread is a standout for several reasons:
- Gluten-Free and Nut-Free: Perfect for those with dietary restrictions or allergies.
- Nutrient-Dense: Tiger nut flour is high in fiber and resistant starch, supporting gut health.
- Naturally Sweet: Ripe bananas and maple syrup reduce the need for refined sugar.
- Versatile: Enjoy it for breakfast, snacks, or dessert, with endless customization options.
- Easy to Make: Simple ingredients and steps make it accessible for beginner bakers.
Conclusion
This Tiger Nut Flour Banana Bread by yummyrecipes is a delicious, healthy twist on a classic American favorite. With its gluten-free, nut-free base and naturally sweet flavor, it’s a versatile loaf that caters to a wide range of dietary needs while delivering on taste and texture. Whether you’re baking for yourself, your family, or a special occasion, this recipe is sure to become a go-to in your kitchen. So, grab some ripe bananas, dust off your loaf pan, and enjoy the nutty, moist goodness of this unique banana bread. Happy baking!